
What Actually Causes Grout to Crack
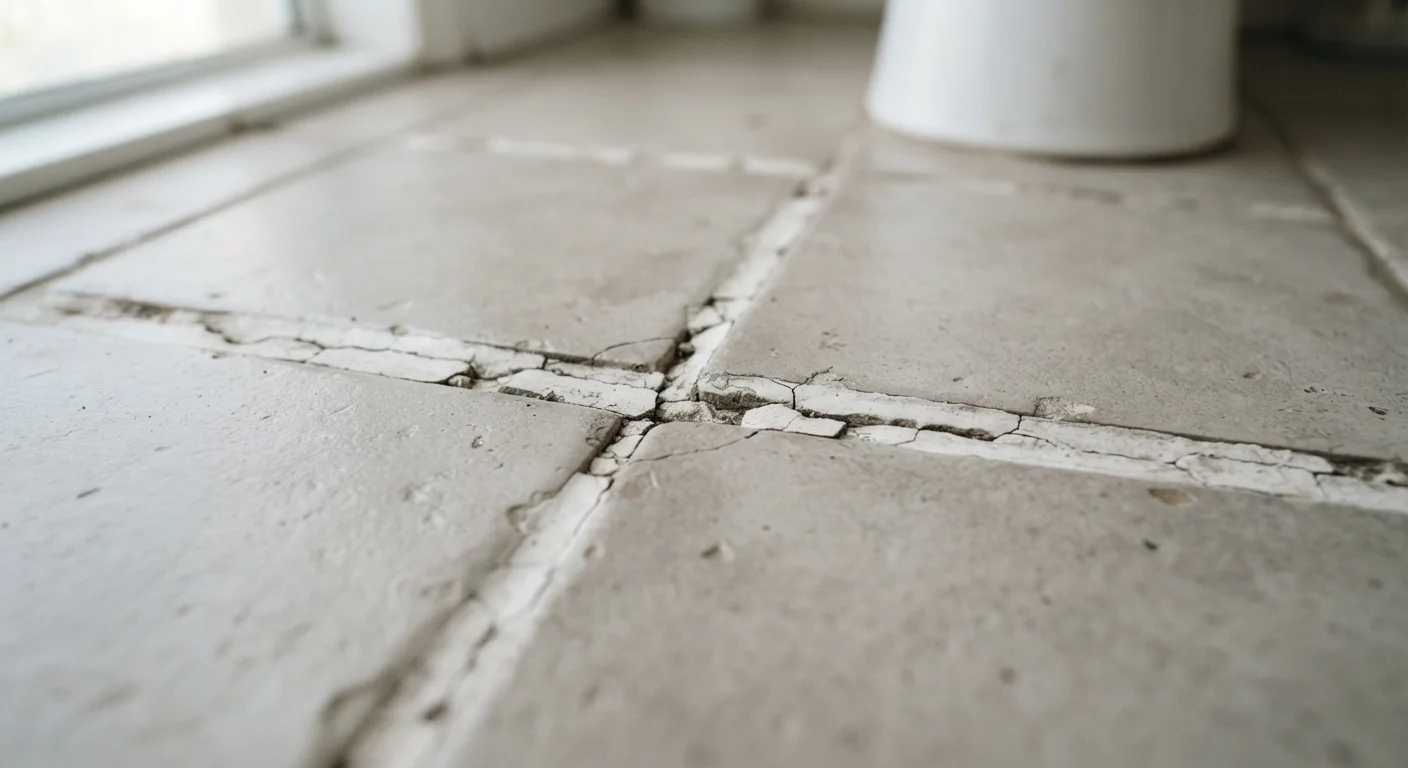
Grout is durable, but it's also rigid — and that rigidity is its main vulnerability. Understanding the root cause helps you judge whether a repair is straightforward or whether something bigger is going on underneath your tiles.
Normal house settling. All homes shift slightly over time as soil compresses and the structure adjusts. This movement creates stress in rigid materials like grout, producing hairline fractures — especially along longer grout lines or near heavy fixtures.
Substrate flex. If the surface beneath your tile — the subfloor or backer board — has any give, tiles and grout experience repeated micro-movement every time weight passes over them. This is one of the most common causes of cracking floors and is especially common in older homes where subfloors are thinner or less rigid.
Thermal expansion and contraction. Tile and grout expand slightly in heat and contract in cold. Outdoor tile installations and rooms with dramatic temperature shifts (like sunrooms or mudrooms) are particularly susceptible.
Improper installation. Insufficient mortar coverage under tiles, grout mixed too wet, or grouting done too soon after tile setting can all lead to premature cracking. These issues often show up within the first year or two after installation.
Moisture damage. Water is a slow but relentless force. If water sits on unsealed grout repeatedly, it works its way into the material, weakening it from within. In freeze-prone regions, this moisture can expand when it freezes, splitting grout apart.
Grout vs. Caulk: Use the Right Material
A common installation mistake — and DIY error — is filling corners and change-of-plane joints with grout. Because these joints experience constant movement as two surfaces expand and contract independently, rigid grout will always crack there. The correct fix is a flexible, waterproof silicone caulk matched to your grout color. This applies to shower corners, the tub-to-wall joint, and floor-to-wall transitions.
Cosmetic Crack vs. Structural Warning Sign
Not every crack demands the same response. Here's how to read what you're seeing:
- Hairline cracks, isolated spots, stable tiles: Almost certainly cosmetic. The tile underneath feels solid, nothing moves when you press on it, and the crack hasn't spread in months. This is a DIY regrouting job.
- Cracks that return after repair: If you've patched a crack and it reappears in the same line, something is moving beneath the surface — subfloor flex, settling, or inadequate mortar. Repair without diagnosing the cause will keep failing.
- Tiles that shift or feel hollow: Tap across your tiles. A solid, dense sound is good. A hollow or drumlike sound indicates the tile has lost its bond with the substrate. Regrouting alone won't fix a de-bonded tile.
- Cracks spreading from a single point or running diagonally: This pattern can suggest foundation movement or significant structural stress. It warrants a closer look — and possibly a conversation with a licensed contractor or structural professional.
As a general rule: if the grout is cracked but the tile is solid and the crack is stable, you're likely looking at a simple maintenance task. If tiles rock, feel hollow, or the cracks recur, dig deeper before reaching for the grout float.
Regrouting as a DIY Task: What's Involved
For stable, surface-level cracks, regrouting is a realistic weekend project for most homeowners. Here's what the process generally involves:
- Remove the old grout. Use a grout saw (a manual tool with a carbide blade) or an oscillating multi-tool with a grout removal attachment. Work carefully to avoid nicking the tile edges. Aim to remove at least 2–3 mm of depth so the new grout has something to grip.
- Clean the joints. Vacuum out dust and debris, then wipe down with a damp cloth. Any residue left behind will compromise the bond.
- Mix and apply new grout. Follow manufacturer ratios carefully — grout mixed too wet shrinks as it cures and is prone to cracking all over again. Work in small sections, pressing grout into joints firmly with a rubber grout float held at roughly a 45-degree angle.
- Wipe and cure. Remove excess grout with a lightly damp sponge before it hardens. Allow the full cure time recommended before exposing the surface to water — typically 24 to 72 hours depending on the product type and ambient humidity.
- Seal when dry. A penetrating grout sealer applied after full cure helps repel moisture and significantly extends the life of your work. This step is especially important in bathrooms and kitchens.
If you're less confident about this project, our guide to DIY fixes that often go wrong outlines where tile repairs most frequently trip up homeowners.
Seal Grout in Wet Areas Annually
In showers, around tubs, and on kitchen countertops, apply a penetrating grout sealer once a year to block moisture absorption. It takes only a few minutes and dramatically slows the cycle of cracking and deterioration. Look for the water bead test: if water soaks in rather than beading up, it's time to reseal.
When to Call a Professional
Some grout problems are symptoms, not the disease itself. Call in a licensed tile contractor or a structural professional if you notice:
- Multiple cracked or hollow-sounding tiles across a large area
- Visible water damage, staining, or soft spots on the substrate once tiles are removed
- Cracks that run diagonally or radiate from a corner in a consistent pattern
- Any sign that the subfloor itself is damaged, rotted, or inadequately supported
It's also worth noting that water damage from cracked grout doesn't stay contained. If moisture has been entering a shower floor undetected for months, the backer board and subfloor below may need replacement — a job that goes well beyond regrouting. Similarly, poor drainage around the home's foundation can contribute to the kind of soil movement that stresses interior finishes. Our article on what happens when gutters are ignored explains how exterior water management connects to interior structural health.
When in doubt, an inspection from a qualified professional costs far less than repairing secondary damage caused by a problem that was patched over rather than properly fixed.
24–72 hrs
Typical grout cure time before water exposure
Most cement-based grouts require at least 24 hours before light contact and up to 72 hours before full moisture exposure in wet areas, though product instructions should always be followed.
2–3 mm
Minimum grout removal depth for reliable adhesion
Tile professionals generally recommend removing at least 2–3 mm of old grout to give new material enough depth to bond and cure properly without premature cracking.