
Why Most Painting Regrets Come from Skipping Prep
Nearly every painting complaint — streaky walls, bleeding tape lines, roller marks — traces back to what happened before the first brush stroke. Prep is unglamorous, but it's where experienced DIYers spend the majority of their time. For a standard bedroom or living room, plan on roughly half your total project time being prep work.
Start by clearing the room as much as possible. Move furniture to the center and cover it with plastic sheeting or old bedsheets. Remove outlet covers, switch plates, and any wall hardware. Wipe walls down with a damp cloth to remove dust and grease — paint won't adhere properly to dirty surfaces, and that's especially true near kitchen or bathroom walls.
Fill any holes or dents with lightweight spackle, allow it to dry completely, then sand smooth with fine-grit sandpaper. For glossy surfaces (existing gloss paint, for example), a light sand across the entire wall gives the new paint something to grip. Wipe away sanding dust before moving on.
What you will need
If you're thinking about a feature wall rather than a full repaint, see our guide on accent wall materials and how they compare before committing to paint alone.
Taping, Protecting, and Setting Up for Success
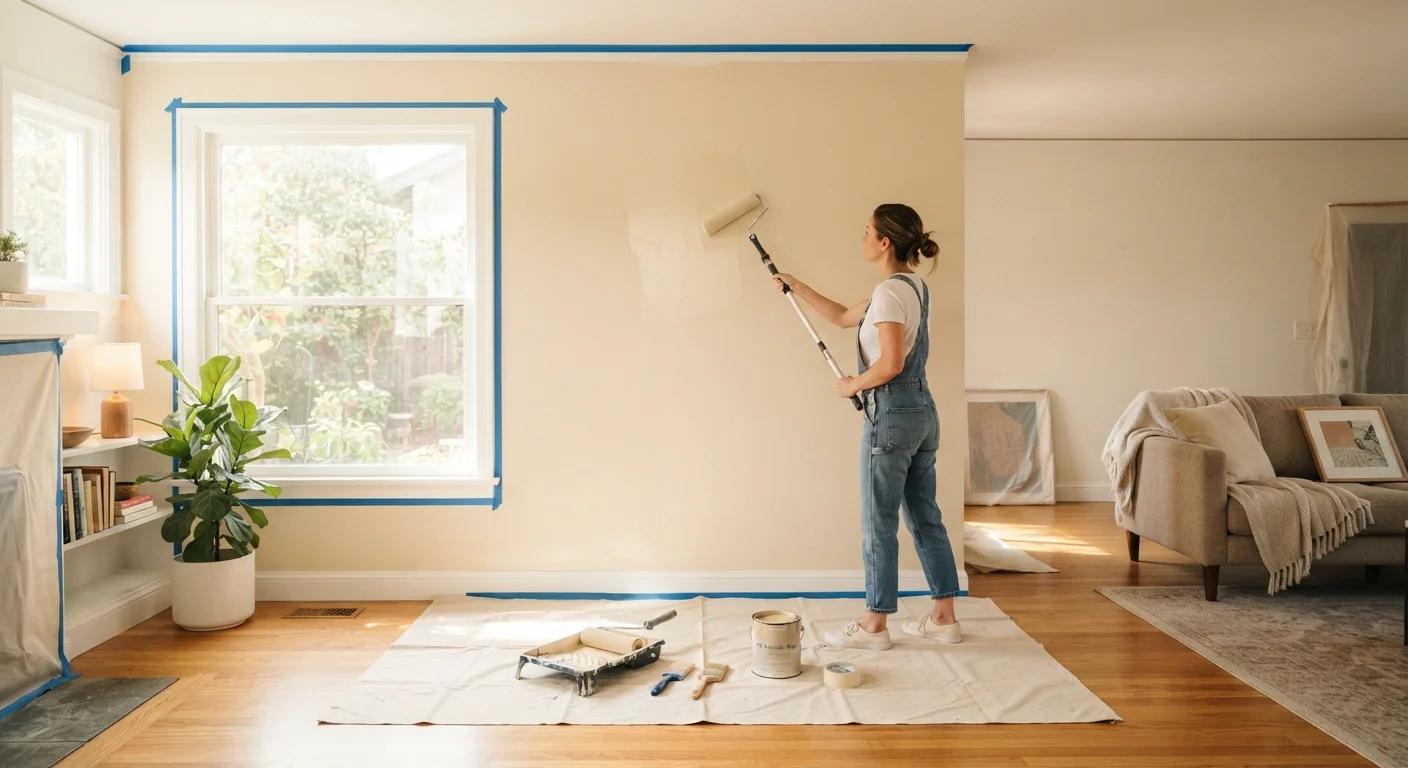
Painter's tape is only as good as its application. Press the edge firmly along trim, baseboards, window frames, and ceiling lines using a putty knife or your fingernail — air pockets let paint seep underneath and ruin your lines. Apply tape at a 45-degree angle to the surface so the adhesive edge sits flat against the boundary.
Remove Tape Before Paint Fully Cures
Painter's tape should come off while the final coat is still slightly tacky — not bone dry. If paint fully hardens over the tape edge, removing the tape can peel away chunks of your fresh coat. Check the paint's open time on the label and plan to pull tape within that window.
Lay drop cloths across your entire floor. Canvas drop cloths are more durable and less slippery than plastic sheeting, which matters if you're moving a ladder around. Overlap seams generously — paint has a way of finding the gaps.
Pour paint into a roller tray and load your roller evenly, rolling out excess on the tray's ribbed section. A saturated roller will drip; an under-loaded one leaves streaks. For trim and edge work, a 2-inch angled brush gives you the most control.
Painting in the Right Order
Sequence matters more than most first-timers expect. Follow this order to minimize overlaps and avoid painting yourself into corners — literally and figuratively.
Paint the ceiling first
Use a roller with an extension pole to cover the ceiling in overlapping W-shaped strokes. Work in sections of about 3–4 feet. Cut in along the ceiling-wall junction with an angled brush before rolling each section. Ceiling paint drips onto walls — that's expected. You'll cover it when you paint the walls.
Cut in the walls before rolling
Using your angled brush, paint a 2–3 inch band along all edges: where walls meet the ceiling, corners, around trim, and along baseboards. This "cutting in" step creates clean lines the roller can't reach. Work one wall at a time so the cut-in section is still slightly wet when you roll — this helps blend the two areas seamlessly.
Roll the walls in two thin coats
Apply the first coat using overlapping W or M patterns, working top to bottom. Maintain a wet edge to avoid lap lines. Allow the first coat to dry fully according to the paint manufacturer's guidance — typically 2–4 hours for latex paints — before applying the second coat. The second coat fills in thin spots and evens out color depth.
Finish with the trim
Paint baseboards, door frames, and window trim last using your angled brush. Work carefully and slowly. If you taped the trim before painting walls, this step simply refreshes and neats up the trim color. If your trim paint is a different sheen (semi-gloss is common on trim), be precise — semi-gloss on a flat wall creates a noticeable contrast at any bleed spot.
After the final coat is fully dry, remove painter's tape slowly at a 45-degree angle to avoid pulling fresh paint with it. If you notice any bleed-through, touch up with a small brush once the tape is off.
For more context on where paint projects can go sideways, our article on DIY fixes that often go wrong covers the most common pitfalls homeowners hit with surface work and repairs.
Cleanup, Ventilation, and Final Checks
Open windows and run a fan throughout the project and for several hours after finishing. Adequate airflow speeds drying and reduces fume buildup — latex (water-based) paints are lower in VOCs than oil-based options, but ventilation is still important.
Clean brushes and rollers under warm running water immediately after use if you're using latex paint. Letting them sit causes the bristles and nap to stiffen and ruin the tools. For oil-based paints, use the appropriate solvent and follow disposal instructions on the label — don't pour solvents down a household drain.
Store Leftover Paint Properly
Seal leftover paint by placing plastic wrap directly on the paint surface before pressing the lid down — this prevents a skin from forming. Store cans upside down in a temperature-stable location (not a garage that freezes) to extend shelf life for touch-ups. Label each can with the room it was used in and the application date.
Once everything is dry, reinstall outlet covers and hardware, return furniture to position, and inspect the walls in both natural and artificial light. Raking light (a lamp held at an angle to the wall) will reveal any thin spots or roller texture you want to address before calling it done.
If you're renting rather than owning, it's worth reviewing how to decorate a rental without permanent changes — painting may not always be permitted without landlord approval, and there are plenty of reversible alternatives.