
Why the Attic Is the Most Overlooked Space in the House
Out of sight and awkward to access, the attic is the one space most homeowners open once — during move-in, if then — and never revisit. That neglect is expensive. Moisture that enters through a small roof imperfection can saturate insulation and slowly rot rafters over years before any ceiling stain appears inside the home. Pest colonies establish and expand undisturbed. Insulation shifts and thins, quietly raising heating and cooling bills. Many of these issues are flagged as a result of home maintenance myths that lead people to assume problems will announce themselves clearly — they often don't.
A basic attic inspection requires no special skills, no tools beyond what most homeowners already own, and rarely takes more than half an hour. The goal is not a professional-grade audit but a simple visual pass that catches developing problems early, when they are still inexpensive to fix. As our coverage of deferred maintenance costs makes clear, waiting almost always increases the bill.
What you will need
What to Bring and What to Watch Out For
The right gear makes this a quick, safe task rather than an unpleasant ordeal. Insulation materials — especially older fiberglass batts — shed airborne fibers that irritate the lungs and skin on contact. A basic respirator and safety glasses are non-negotiable. Beyond personal protection, the tools below will help you read what you're seeing accurately.
Bright Flashlight or Headlamp
Illuminates dark corners, rafter bays, and the underside of roof sheathing where damage hides.
N95 or P100 Respirator
Protects lungs from fiberglass particles, dust, mold spores, and rodent droppings.
Crawl Board or Plywood Sheet
Distributes your weight across joists so you don't fall through an unfinished attic floor.
Moisture Meter
Gives a quick numeric reading on whether wood or insulation is retaining problematic moisture levels.
Tape Measure
Helps you estimate insulation depth to compare against recommended R-value levels for your climate zone.
Know Your Attic's Structural Limits
Many attics are not designed to support a person's full weight across the entire floor. Step only on joists — the wooden beams — never on the insulation between them, which may conceal open gaps to the ceiling below. If your attic has no flooring boards over the joists, lay down a piece of plywood or use a crawl board to distribute your weight safely.
Step-by-Step Attic Walkthrough
Work methodically from the hatch outward, covering one section at a time rather than moving randomly. Take your phone or a small notepad to record anything that needs attention — photos are especially useful if you plan to show a contractor or inspector your findings later.
Gear Up Before You Go In
Put on your respirator, safety glasses, gloves, and long sleeves before opening the hatch. Attic air regularly contains fiberglass fibers, accumulated dust, and in some cases mold spores or dried rodent droppings. Set your ladder on a flat, stable surface and confirm the hatch opening is clear before climbing.
Check the Attic Floor for Safe Footing
Before stepping fully into the space, scan the floor area with your light. Identify where the joists run and step only on those. If there is no decking, slide your crawl board or plywood sheet over the joists ahead of you as you move. Never trust the insulation as a walking surface.
Inspect the Roof Sheathing and Rafters
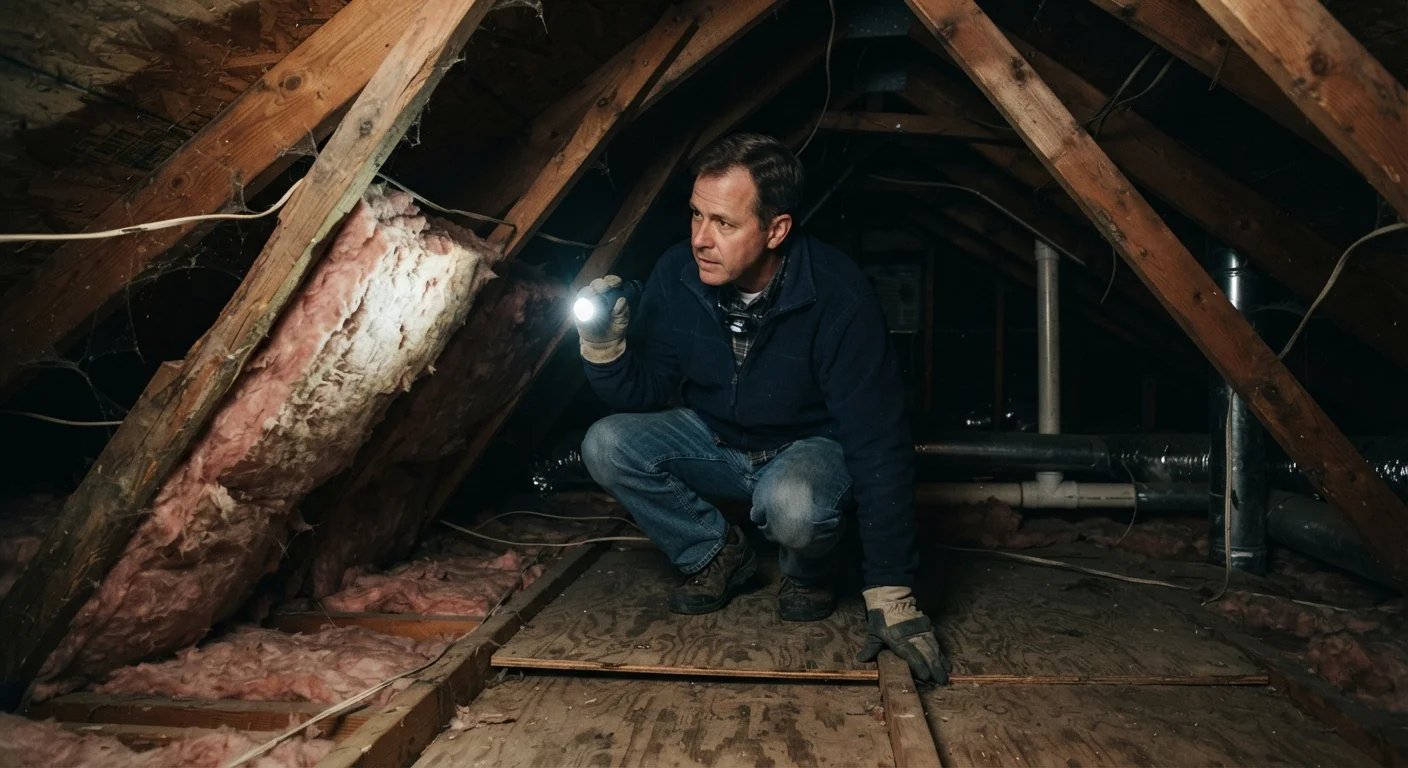
Look up and sweep your light slowly across the underside of the roof deck (the plywood or board sheathing attached to the rafters). You are looking for dark staining, soft or discolored wood, or any pinhole daylight visible from outside. Dark stains can indicate either a current leak or a past one that dried — both merit follow-up. Check rafter edges for any signs of splitting or pest damage.
Assess the Insulation Coverage
Check that insulation covers the entire attic floor evenly, with no gaps, thinned areas, or spots where it has been pushed aside. Use a tape measure to spot-check depth in a few locations. Insulation that has been compressed or disturbed loses much of its thermal value. Also note whether the insulation covers the tops of interior wall plates — gaps there are a significant source of heat loss.
Look for Pest Evidence and Entry Points
Scan along the eaves, ridge, and any location where pipes, wires, or HVAC ducts penetrate the attic floor or exterior walls. Gaps as small as a quarter inch can allow mice entry; larger openings may admit squirrels or raccoons. Look for droppings, nesting material (shredded insulation, paper, leaves), gnaw marks on wood or wiring insulation, or grease trails along beams. If you find active evidence of a rodent or wildlife infestation, note the locations and consult a pest management professional rather than attempting removal yourself.
Check Ventilation Components
Locate your soffit vents (along the eaves) and any ridge vent, gable vents, or roof vents. Confirm that insulation hasn't been pushed over and is not blocking the soffit vents — this is one of the most common attic airflow problems. Adequate airflow reduces moisture buildup and helps prevent ice dams in cold climates. Also verify that bathroom or kitchen exhaust fans duct to the exterior, not into the attic — terminating exhaust fans inside the attic is a frequent moisture source that leads to mold.
Stop if You Spot These Hazards
Knob-and-tube wiring (older two-wire systems without a ground, often visible as ceramic knobs and tubes along joists) and loose-fill asbestos insulation (gray, granular material common in homes built before the 1980s) require licensed professional assessment — do not disturb or continue working near them. If you are unsure what you are looking at, exit the attic and consult a qualified inspector.
After the Inspection: Sorting What Needs Professional Help
Most of what you find during a basic attic walkthrough will fall into one of three categories: items you can address yourself (sealing small gaps around penetrations with appropriate fire-rated caulk or expanding foam, repositioning displaced insulation, replacing crushed baffles), items worth monitoring on your next visit (minor staining that reads dry on a moisture meter), and items that require a qualified professional (active leaks, structural damage to rafters, mold colonies, evidence of active pest infestation, or suspect wiring).
Sealing gaps around plumbing and wiring penetrations is one of the highest-impact DIY tasks in any home — it reduces both air leakage and pest entry simultaneously. However, be aware that some repairs that look straightforward can create new problems if done without the right materials or technique. When in doubt, get a second opinion before acting.
Attic moisture problems and crawl space moisture problems often share root causes — drainage, ventilation, and vapor management. If your attic inspection surfaces persistent condensation or staining, it may be worth also reviewing what is happening at the foundation level. Our guide to keeping a crawl space dry covers the connected dynamics in detail.
Best Time to Inspect Your Attic
Do your walkthrough during daylight on a clear day. Natural light filtering through any gaps, cracks, or missing roof sheathing makes air-leak and damage points much easier to spot. Pairing your attic check with a fall home walkthrough before winter is an efficient habit.